miz1q2w3e said:
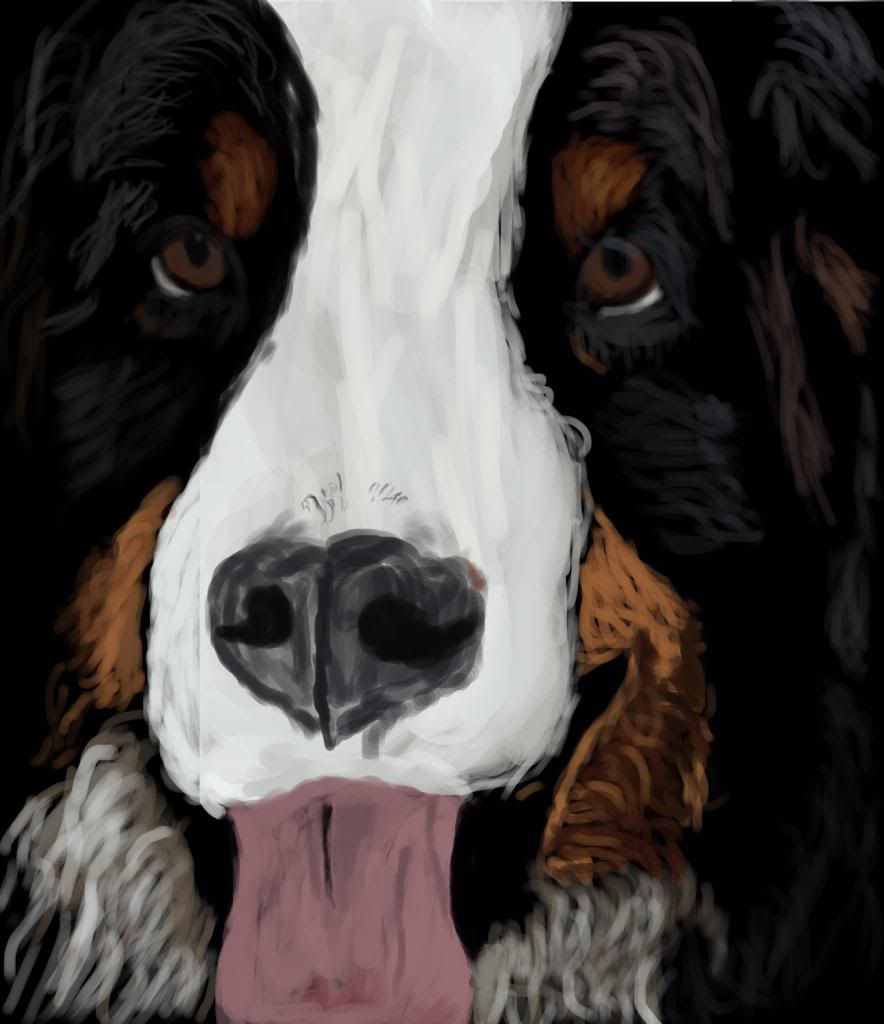
As promised, here's my drawing :)

I'm pretty nooby so ALL feedback is welcome - This is my first for real drawing ever, besides when I first tried out my drawing pad. This took maybe four sessions to complete, each session around 2 hours.
Thanks Marucha for making this thread :) |
NOOB! Haha!
jk.......
This is a good start. The form feels a little fat in the cheek bone because there's no variation of hard edge versus soft. For example, up closer to underneath her eye, there should be probably the sharpest point because that's wehre the shadow is reflecting off ... and then also the cheek bone usually there is a sharper edge.... the sharpness of the iris and eyelids pull the attention away from the whole face. Usually you put down hard lines and then taper the edges/blend/fuzz details a bit farthest away from you to help... I'll paint over a bit since it's easier to explain. Also, the upper part of her eyelid is missing?... it depends on the model how much it shows, so you may need to put just a teeny eency hint of the highlight color... but something will connect you to the form there... you have to look at the model to see how much shows.
Sharpness in the edges where the light hits the forehead will depend on the how sharp/gradual the curvature of the skull is... usually at the highest part, it turns back sharper... and then sometimes there is a sharp-er-ness light on the part just above where the eyebrow starts because of the brow-bone being so prominent there.. how much sharpness depends on how much of a curvature and the model's bone structure underneath... same with the prominence of the cheek. Just think of where those sharp edges and those fuzzier edges meet... usually it fuzzes more as it goes backwards into the distance. Some blurry edges are blurrier than others depending on where you decide to emphasize your focal point... what's facing the light and hits the curve immediately will produce the sharpest shadow and then it tapers off.
Her iris is really tiny, which suggests light should be actually in her eyes ... Your shadow work is off to a good start. It's just push the values (darkest darks, brightest brights)/edges a bit to describe the form better... again ,I'll paint over to show what I mean...
Also underneath eyelid you will sometimes be able to see the skinny part before the eyelash starts... I would imagine in this pose you could see some... and also, you will have a slight shadow over the iris/eye-y part... and then there be slight specular light in the cornea... and also reflection in iris.. .if the pupils are super small, usually means light blasting straight into the eyes? You will soemtimes see fine lines underneath the eye itself that are hairline wrinkles, or maybe also depending on the angle, you can see the skin-ish-part that folds around the eyeball itself. blah blah blah blah.
Skin is difficult, because it's a bit translucent (blood and guts and such underneath) and so you will see so many more patches of colors in the face than you would think would normally be there... especially if you have a person who has a tan or is flushed somewhat. Skintones are just complicated in general. They suck. That's why sometimes when I am working out a composition or solving a mystery of how to depict something, I will stick to black and white and not complicate it with color until I have values down right first... you can turn that to color, some people only strictly paint black and white first and then "repaint" in color without actually affecting the values underneath.
In the hair, there should be some 'brighter portions', like gradientt-ish highlights, shadows... a lot of that is just glazing.
But when I look at a reference, look for the little nuances that will help depict the form... it's not important to have every little detail, but definitely certain things you will emphasize .. like the closest part of the face that is facing the camera can be ultra sharp, but then the hair surrounding it going back may taper off and get whispy towards the end and it still looks beautiful/right. In portraiture, we don't recognize a face by the details as much. Generally, it's the shape/proportion of the form/contour of the head relative to the position of the main features (like position of eyes, nose, the shape of those forms and bone structure that do most of the work... details are just details... you will be surprised how little information you can get away with using in a sketch to make a person recognizeable... that's why gestures are really helping you nail quality forms. It promotes looseness, but it also helps you make something mostly recognizeable with less marks/details.
I did a crap job on the hair, but I put some highlight and shadow just to show waht I mean by value boost. This is a wonderful composition.. I don't see a whole lot of problems with the anatomy (a big issue for most people, so that's good). Mainly it's just your edges and values you need to boost as well as to add some reflected light (look at the PSG tutorial in the OP)... learning how to use edges too can really boost your images and emphasize focal points in your work. Other minor detail, just be careful where you put black... black doesn't produce rich shadows, usually it's more often a complimentary color of some kind even like a dark dark dark brown that is maybe a little less saturated would be better for iris (though it's usually black honestly)... but it tends to turn somewhat brown in direct light... reflective light is as result of light bouncing off everything else
Wonderful piece :)